How to use PixelBid
From an empty calculator to a quote you can send, in about ten minutes. Each step names the card and the buttons as they appear on screen. Nothing here needs an account until step 10.
1. Open the calculator
Go to pixelbid.ai/calc. It works without an account, with up to 5 PDFs a day. Top right, pick "Imperial" or "Metric" and your language; every figure and document follows.
The four tabs along the top are the four ways to look at one design: "Calculator", "3D", "Site photo" and "Report". You can switch at any time; nothing is lost.
2. Size the screen
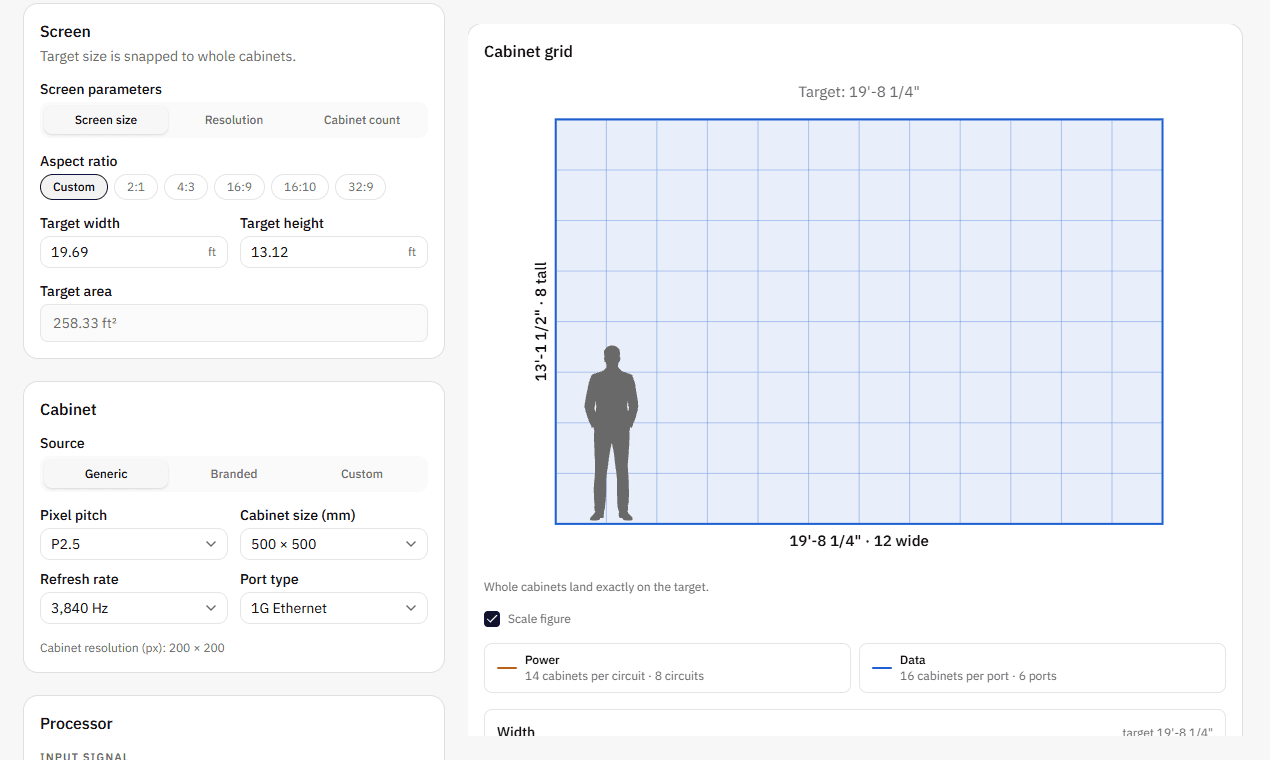
In the "Screen" card, choose how you want to size it under "Screen parameters": "Screen size" (a width and height), "Resolution" (pixels across and down) or "Cabinet count". Pick an aspect ratio, or "Custom".
The target is snapped to whole cabinets. The "Cabinet grid" on the right shows the wall with a person for scale; when the target falls between two sizes it offers "Round up" and "Round down" — take the smaller if the opening cannot take the larger.
3. Choose the cabinet
In the "Cabinet" card, "Source" offers three ways. "Generic" picks a cabinet by pixel pitch and size. "Branded" opens the library of 59 cabinets from Absen, Gloshine, INFiLED, Leyard, Unilumin (with a free account); under the model it says which datasheet the figures came from and whether they have been checked. "Custom" (or "Model not listed…") takes your own panel size and pixels; leave weight, power and brightness blank and they are estimated from the pitch.
4. Describe the site (optional)
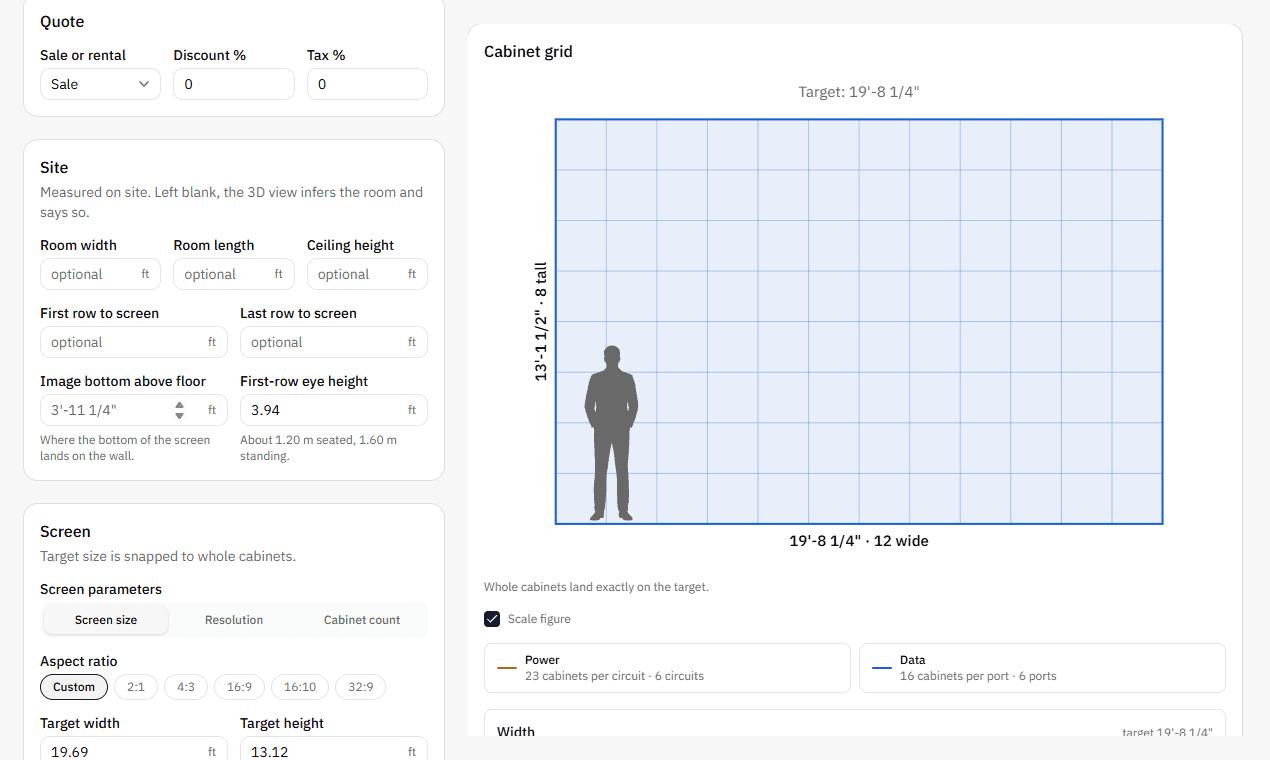
The "Site" card takes the room width, length and ceiling height, the first and last row to the screen, where the bottom of the image sits and the first-row eye height. All optional: left blank, the 3D view infers a room and says so.
With the rows filled in, the results check the nearest seat — the centre of the front row — against the minimum viewing distance for the pitch, and the plan drawing maps every seat by how good the view is.
5. Set the power
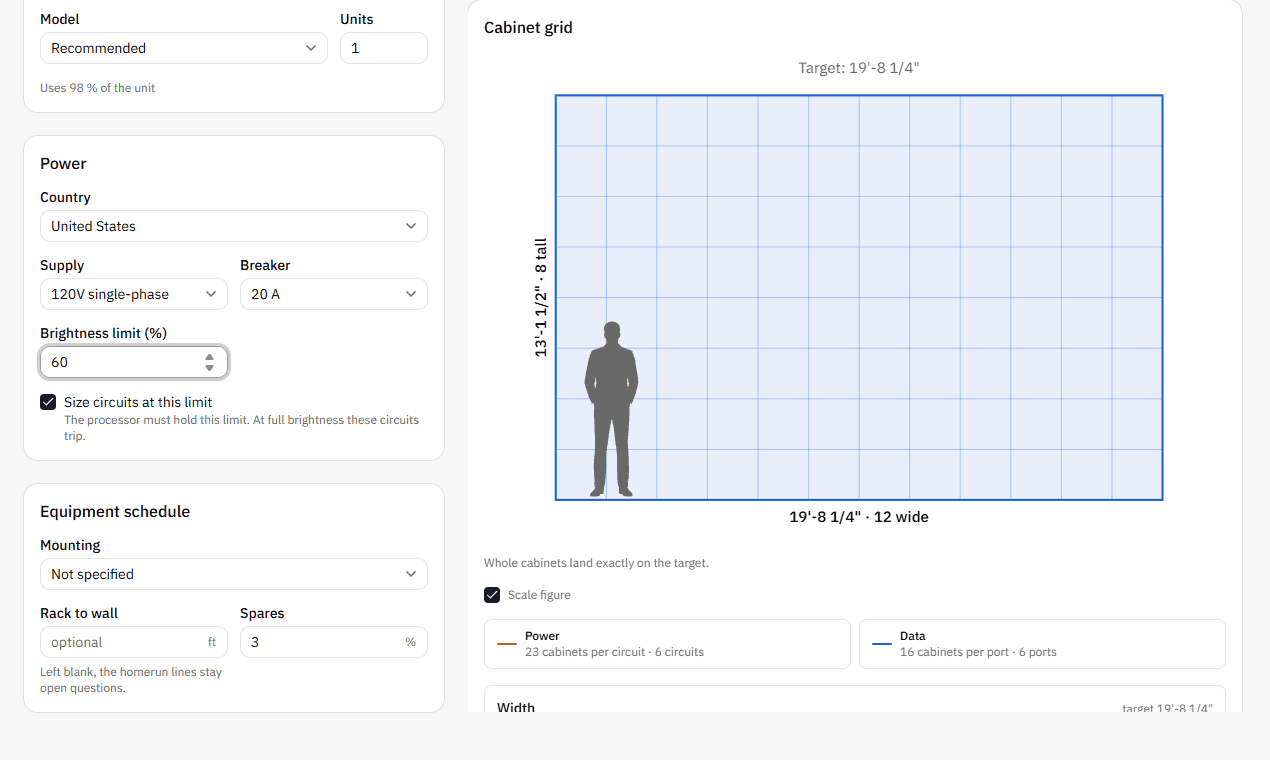
In "Power", choose the country, the supply and the breaker. Circuits load each breaker to 80% (the US NEC continuous-load rule) and are counted from the runs actually drawn.
If the processor will hold the wall to a brightness limit, enter it in "Brightness limit (%)": the results add the maximum draw at that limit. Circuits stay sized for full brightness unless you tick "Size circuits at this limit" — then every document says so, because those circuits trip at full brightness and the limit has to be locked in the processor.
6. Processor and data
In "Processor", describe the "Input signal" — connector, resolution, bit depth and frame rate — and the recommended unit appears, NovaStar by default, with how much of it the wall uses. Choose a model yourself under "Model" if you prefer one.
Data runs are sized to what one port of that processor carries at your bit depth, and drawn port by port.
7. Check the results
The results card on the right opens with a status: "No issues found", "Check the notes below" or "Will not work as designed", and the notes say what to change. Under it: the grid, the power and data drawings with their circuit and port counts, structure, viewing distances and the processor.
8. See it in the room
The "3D" tab draws the wall in the room from a seat, or from above, the side or behind. "Site photo" puts it on a photo of the actual wall: choose a photo, drag the four handles onto the corners of the wall, and check that the 1.80 m figure looks the right height. The photo stays in your browser — nothing is uploaded.
9. Build the quote
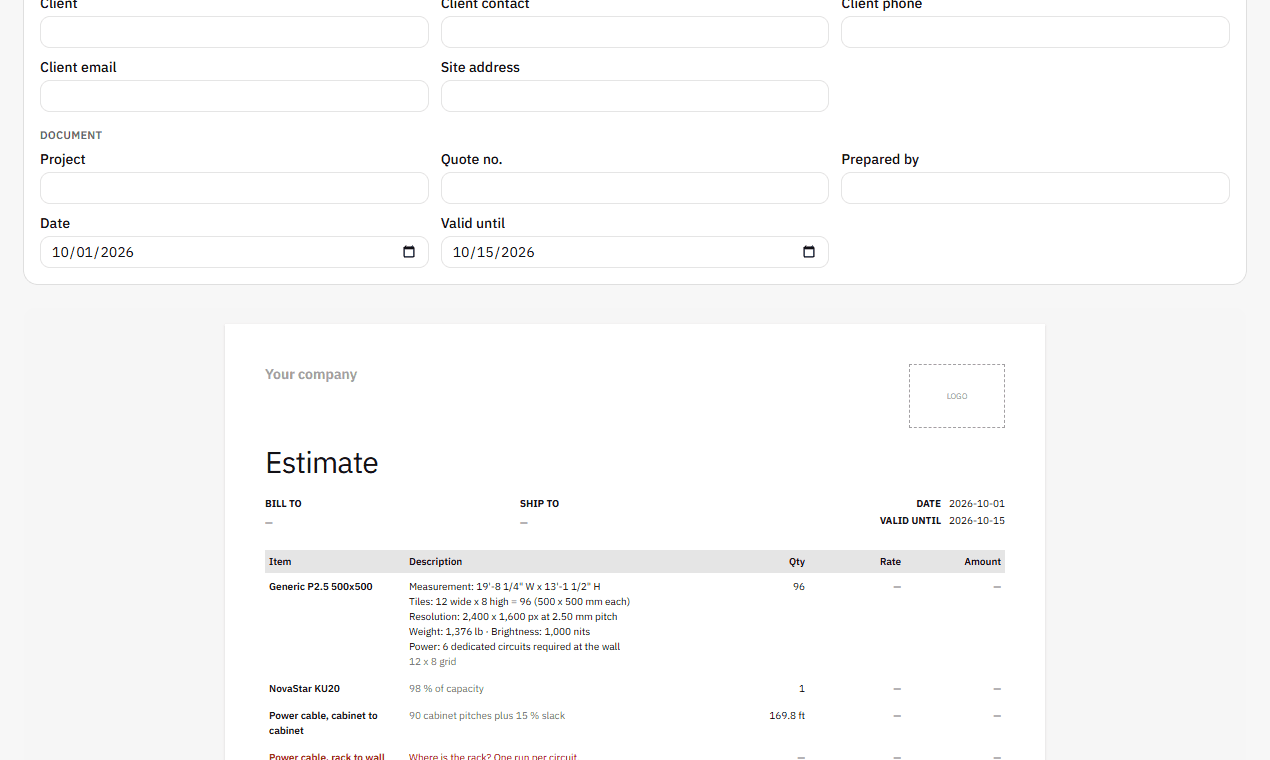
The "Report" tab is the document. "Client" is the quote your client reads; "Full engineering" adds the drawings and every figure. Fill in "From", "Prepared for" and "Document", choose "Sale" or "Rental", and enter unit prices; a line nobody has priced prints as a red dash, never a zero. Sales tax is set line by line, and lines can be removed or added.
"Save as PDF" makes the document; "Bid schedule" is the same quote as a spreadsheet; "CSV" is the bill of materials. With Pro ($39 a month or $390 a year) you also get "DXF" — the elevation at true size for CAD — the "Export package" with everything in one file, your logo and terms, and no PixelBid line at the foot.
10. Save it
A free account keeps your designs as projects, opens the branded cabinet library and allows 10 PDFs a day. New accounts get 14 days of Pro. From the calculator, save the design as a project; a project can hold several options for the same room.
11. Get help
Email support@pixelbid.ai; we reply within one business day (US Pacific time). Every formula and data source is on the "How it works" page (pixelbid.ai/methodology) — if a number disagrees with yours, tell us and we will show our working.